

Yes, engine bay detailing is safe when you let the engine cool, protect electrical components, use a water-based degreaser, rinse with low pressure, and dry every surface completely before closing the hood. Done this way, most vehicles take less than one hour and carry minimal risk. Skip the drying step or blast a fuse box with a pressure washer, and you're gambling with a check-engine light or worse.
TL;DR:
- Thorough masking of electrical components, fuse boxes, and exposed connectors is essential to prevent moisture intrusion and electrical damage during cleaning.
- Using a water-based, non-caustic degreaser diluted appropriately and rinsing with low-pressure water minimizes risks of streaking, warping, or staining sensitive surfaces.
- Proper drying with microfiber towels and compressed air prevents residual moisture that can cause electrical issues or trigger warning lights after cleaning.
- Home detailers should perform engine bay cleaning every few months, or more often if exposed to harsh conditions, and prioritize inspection for leaks or damage.
- Complex bays or high-voltage systems require professional service; DIY cleaning is safest on straightforward gasoline engines with sealed electrical connections.
Table of Contents
- What Preparation and Safety Steps Come Before Engine Bay Detailing?
- What Tools and Cleaning Products Work Best for an Engine Bay?
- How Do You Clean an Engine Bay Step by Step?
- How Do You Dry and Dress an Engine Bay Properly?
- How Often Should You Detail Your Engine Bay?
- What Mistakes Ruin an Engine Bay Detail?
- Why Professional Experience Still Matters for Engine Bay Work
- What the Conventional Advice Gets Wrong
- Ready for a Professional Engine Bay Detail?
- Sources
- FAQ
What Preparation and Safety Steps Come Before Engine Bay Detailing?
Every mistake we see in a rushed engine bay job traces back to skipping prep. Give the engine at least half an hour to cool after driving, or better yet, start cold the next morning. Spraying degreaser onto a hot exhaust manifold or hot aluminum can cause it to flash dry into streaks, or worse, warp a plastic shroud.
Before any liquid touches the bay, cover the sensitive stuff:
- Alternator and any exposed electrical connectors
- Air intake opening and the mass airflow sensor
- Fuse and relay boxes
- Battery terminals (disconnect the negative terminal on older vehicles with exposed posts, or if you're unsure how sealed your electrical connections are)
- Distributor cap, if your vehicle has one
Blow out loose leaves, dirt, and debris with a leaf blower or shop vac before you introduce any water. Work in the shade, not direct sun, and wear gloves and eye protection. Following this sequence lines up with the safe process outlined by Chemical Guys, which treats cooling and masking as the non-negotiable first move.
Pro Tip: Snap a phone photo of your engine bay before you start covering anything. It's the fastest way to remember exactly where every connector and bracket goes back.
What Tools and Cleaning Products Work Best for an Engine Bay?
Your kit doesn't need to be complicated. A few soft flagged detail brushes in different sizes, a stack of microfiber towels, a couple of spray or mixing bottles, plastic bags with rubber bands or painter's tape for covering components, and a leaf blower or compressed air canister cover most jobs.
The chemistry matters more than the tools. Stick with water-based, non-caustic degreasers, and match the dilution to how dirty the bay actually is:
- Light grime (dust, light road film): dilute heavily, roughly 10:1 with water
- Medium grime (general road grease): moderate dilution, around 4:1 or per label directions
- Heavy grime (oil film, years of neglect): closer to full strength, applied in small sections
Avoid high-pH caustic cleaners and harsh solvents. They strip protective coatings off wiring and can permanently stain or whiten aluminum and plastic trim, according to Detailed Image's engine bay guide. Skip silicone-based dressings too. They look glossy at first but sling once the engine heats up and attract dust almost immediately. For chemicals and finishing products built for this kind of work, a supplier like Diamondbrite carries dedicated engine-safe formulas. If the grime looks baked on or the bay hasn't been touched in years, that's usually the point where professional engine detailing services make more sense than another bottle of degreaser.
How Do You Clean an Engine Bay Step by Step?
Once the engine is cool and everything sensitive is covered, the actual cleaning follows a predictable rhythm: pre-rinse, degrease, agitate, rinse, inspect.
-
Pre-rinse first. Using a garden hose on a gentle setting, rinse from back to front to knock loose surface dust and cool any remaining warm spots. A quick pre-rinse also stops the degreaser from flash-drying on warm metal, which is what causes streaking and wasted product, per GetUndrdog's detailing protocol.
-
Work one section at a time. Spray degreaser on a manageable area, maybe the strut towers, then the plastic engine cover, then the firewall, rather than soaking the entire bay at once.
-
Let it dwell. Fifteen to thirty seconds is typical for medium grime; heavier oil film can sit longer, up to a couple of minutes, but never let it dry on the surface.
-
Agitate with the right brush. Soft flagged brushes work on painted surfaces and plastic covers. Smaller detail brushes get into brackets, hose clamps, and tight corners without gouging anything.
-
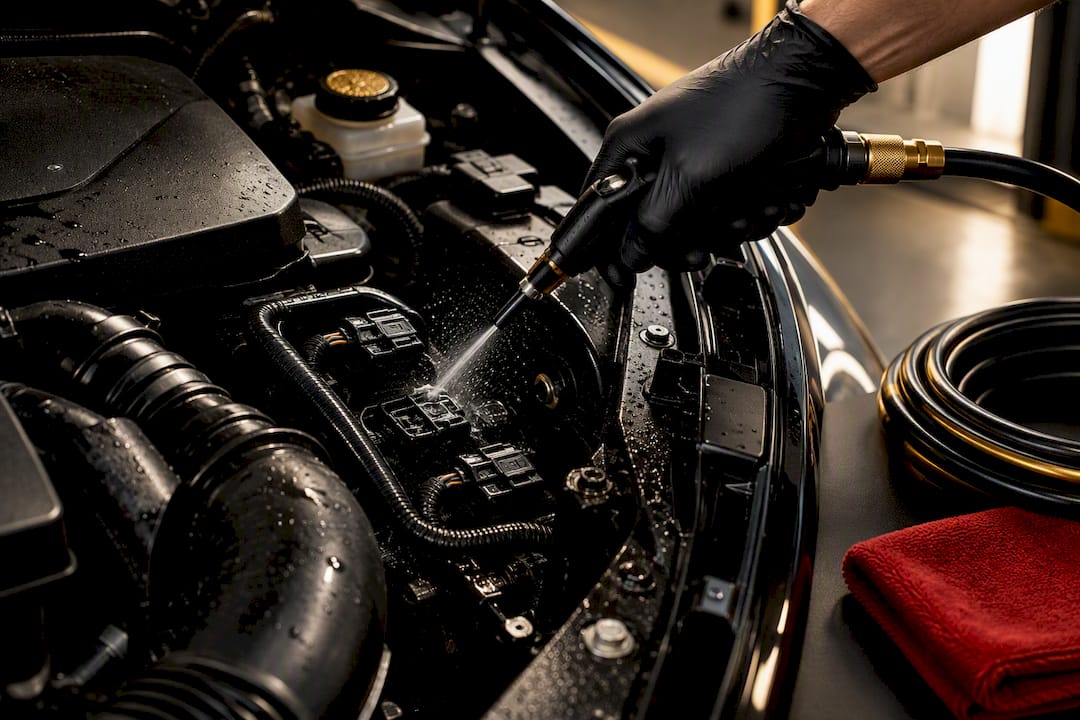
Rinse that section immediately. Low-pressure water only. If you're using a pressure washer instead of a hose, keep it on a wide fan tip, at least three feet away, and on the lowest PSI setting your machine offers.
-
Move to the next section and repeat until the whole bay is degreased and rinsed.
-
Remove covers carefully and inspect for any water that pooled in connector housings or electrical boxes. Spot-treat any areas that still show grease and give them a second rinse.
Pro Tip: Dwell time beats scrubbing every time. If you're leaning hard on a brush to lift grime, the degreaser hasn't had enough contact time yet, add another 15 seconds instead of more elbow grease.
How Do You Dry and Dress an Engine Bay Properly?
Drying is where most home jobs fall short, and it's also where most electrical problems actually start. Wipe flat, accessible surfaces with a dry microfiber towel first. Then use compressed air or a leaf blower to chase water out of crevices, connector plugs, and anywhere a towel can't reach.
Once the visible water is gone, start the engine and let it idle for about 10 minutes with the hood open. The heat evaporates trapped moisture in spots you couldn't dry manually and gives you a chance to confirm no warning lights or rough idle show up, a step Chemical Guys and Swissvax's professional protocol both treat as a mandatory final check, not an optional flourish.
For plastics, rubber hoses, and trim, apply a water-based, non-silicone satin dressing with a foam applicator or clean cloth:
- Avoid getting dressing on belts, pulleys, or hot metal surfaces
- A light, even coat looks factory-fresh without turning greasy under heat
- Water-based dressings resist dust far better than silicone products, which sling once the engine warms up
Roughly a third of "mystery" electrical gremlins after a home engine wash trace back to moisture that never fully evaporated from a connector housing, which is exactly why the idle-and-inspect step in the Chemical Guys process matters as much as the wash itself.
How Often Should You Detail Your Engine Bay?
Most daily drivers do fine with a full engine bay cleaning every few months. If you're in a coastal area dealing with salt air, driving through winter road salt, or running off-road regularly, tighten that to every one to three months.
Certain triggers call for an unscheduled deep degrease regardless of your calendar:
- Visible oil or coolant leaks staining the bay
- Heavy diesel or soot film buildup
- After any major mechanical work (a clean bay makes it easy to spot a new leak from the repair)
- After long-term storage, when dust and debris have had time to settle into every gap
A clean engine bay isn't just cosmetic. It makes small leaks, seeping gaskets, and worn belts visible early, before they turn into a roadside breakdown. It also matters at resale. A dirty, grease-caked bay signals neglect to any buyer who pops the hood, even if the rest of the car is immaculate.
What Mistakes Ruin an Engine Bay Detail?
The biggest damage we see comes from a handful of repeat offenders:
- Cleaning a hot engine, which flash-dries chemicals and can crack cold plastic components
- Close-range high-pressure washing directly into connectors or the alternator
- Reaching for caustic engine cleaners or aggressive solvents instead of water-based formulas
- Walking away and letting water sit in crevices instead of drying it out
Before you call the job done, run a final inspection pass: check spark plug wells, every exposed connector, and hose clamps for trapped moisture. Match your brush stiffness to the surface, lean on dwell time rather than scrubbing pressure, and give everything a second rinse to clear residue before you dress the plastics.
Pro Tip: If a connector housing still feels damp to the touch after your compressed air pass, don't dress it yet. Let it sit with the hood up for another 20 minutes and check again.
Why Professional Experience Still Matters for Engine Bay Work
A careful home routine handles most engine bays just fine. Complex ones are a different story. Twin-turbo setups, hybrid high-voltage components, exotic engine bays packed with carbon fiber trim, or aircraft and marine engine compartments all carry risks that go past what a weekend detailer should take on solo.

Ssfdetail has serviced more than 1,350 vehicles, with every job personally inspected by owner Steven Shames, and that hands-on experience extends beyond cars into marine engine compartments and private aircraft. If your bay shows heavy oil contamination, you're unsure about disconnecting a hybrid battery system, or you're maintaining a fleet, that's the point where a professional detailing service protects you better than another bottle of degreaser.
What the Conventional Advice Gets Wrong
Most engine bay guides treat the wash like the whole job and treat drying like an afterthought. That's backwards. The degreasing part is nearly foolproof if you're using a water-based product and reasonable dwell times. The failure point almost always sits downstream, in a connector housing that still holds moisture three days later when the check-engine light comes on for no obvious reason.
The other place conventional advice underperforms is the "what to cover" step. Plenty of tutorials mention masking the alternator and call it done. They skip the fuse box, they skip exposed grounding straps, and they rarely mention that older vehicles with corroded battery terminals are far more vulnerable to a stray splash than a modern car with sealed connectors.
If you take one thing from this guide, prioritize the idle-and-inspect step over any product upgrade. A $40 degreaser and a thorough dry beats a $15 premium formula rushed onto a bay you close up wet. Detailing chemistry has gotten better over the years. Patience with drying time hasn't gotten any less important.
— Martin
Ready for a Professional Engine Bay Detail?
If your engine bay hasn't seen a proper detail in years, or you'd rather hand it to someone who's done this on exotic cars, private jets, and megayachts, Ssfdetail's Full Detail and Maintenance Detail packages build engine bay care into a complete service instead of a standalone chore.

Every vehicle that comes through the shop is personally reviewed by owner Steven Shames before it leaves, which matters most on complex bays where a missed connector or a rushed dry cycle can cause real damage. Maintenance and Full Detail PLUS plans are offered for routine upkeep and comprehensive vehicle care, with current prices available on the pricing page. Corporate fleet operators managing multiple vehicles can also look at a dedicated fleet maintenance program built around recurring service instead of one-off bookings. If your bay is heavily contaminated, sits under a hybrid high-voltage system, or belongs to a vehicle you'd rather not experiment on, book a Full Detail through the Boca Raton service page and let someone who's handled over 1,350 vehicles take it from here.
Sources
- How To Clean Your Engine Bay | Chemical Guys
- Engine Bay Auto Detailing Guide — Detailed Image
- How to Detail Engine Bay Safely (2026 Guide) — GetUndrdog
- Engine bay cleaning & sealing — Swissvax
FAQ
Is It Safe to Use a Pressure Washer on an Engine Bay?
Only on a wide fan setting, low PSI, and from at least three feet away, never a narrow jet aimed directly at connectors or the alternator. A garden hose on low pressure is the safer default for most home detailers.
Do I Need to Disconnect the Battery Before Cleaning?
It depends on your vehicle's age and connector sealing. Older cars with exposed terminals benefit from disconnecting the negative terminal first, while modern vehicles with sealed connections often just need the terminals covered.
How Long Does a Full Engine Bay Detail Take?
A careful DIY job typically runs 45 minutes to an hour, including cool-down, cleaning, and drying time. Professional services like Ssfdetail's Full Detail package, starting at $295, fold engine bay work into a longer full-vehicle appointment.
What Kind of Dressing Should I Use on Engine Plastics?
Choose a water-based, non-silicone dressing with a satin finish rather than a high-gloss silicone product. Silicone dressings sling once the engine heats up and attract dust almost immediately, while water-based formulas hold up better over time.
How Much Does Professional Engine Bay Detailing Cost?
Pricing depends on the package and your vehicle's condition. Ssfdetail's Maintenance Detail starts at $199 and its Full Detail PLUS starts at $370, both listed on the car detailing service page.